
Building Java Projects with Maven
Original text: http://spring.io/guides/gs/maven/
Maven Install
- Download the latest binary file from http://maven.apache.org/download.cgi.
- Unzip and move the generated directory to the desired location.
- Add the Maven bin directory to the Path.
- Make sure you have the JAVA_HOME environment variable. Because Maven refers to the JAVA_HOME environment variable, you should create it if it does not exist. (See JDK Install)
Open a command prompt and check the installed maven version with the following command:
C:\Users\kim> mvn -v
Apache Maven 3.9.9
Maven home: C:\Program Files\apache-maven-3.9.9\bin\..
Java version: 21.0.1, vendor: Oracle Corporation
Java home: C:\Program Files\Java\jdk-25.0.2\jre
..
Set up the project
Create the following structure in a project folder of your choosing.
HelloWorld (project root directory)
   └── src
        └── main
             └── java
                  └── hello
The src\main\java is the directory where you put Java source files in Maven projects.
The hello subdirectory is the package name of the Java class we will create.
Create a pom.xml at the root directory of the project
pom.xml
<?xml version="1.0" encoding="UTF-8"?>
<project xmlns="http://maven.apache.org/POM/4.0.0"
         xmlns:xsi="http://www.w3.org/2001/XMLSchema-instance"
         xsi:schemaLocation="http://maven.apache.org/POM/4.0.0
                             http://maven.apache.org/maven-v4_0_0.xsd">

  <modelVersion>4.0.0</modelVersion>
  <groupId>org.springframework.gs</groupId>
  <artifactId>gs-maven-initial</artifactId>
  <version>0.1.0</version>
  <packaging>jar</packaging>

  <properties>
    <project.build.sourceEncoding>UTF-8</project.build.sourceEncoding>
    <maven.compiler.source>25</maven.compiler.source>
    <maven.compiler.target>25</maven.compiler.target>
  </properties>

</project>
- <modelVersion> POM model version (always 4.0.0).
- <groupId> Group or organization that the project belongs. They are mostly inverted domain names.
- <artifactId> Name to be given to the project’s library artifact (for example, the name of its JAR or WAR file).
- <version> Version of the project you are building.
- <packaging> Defaults to jar for JAR file packaging. Use war for WAR file packaging.
Create HelloWorld.java and Greeter.java within the src/main/java/hello directory.
HelloWorld.java
package hello;

public class HelloWorld {
  public static void main(String[] args) {
    Greeter greeter = new Greeter();
    System.out.println(greeter.sayHello());
  }
}
Greeter.java
package hello;

public class Greeter {
  public String sayHello() {
    return "Hello world!";
  }
}
Build Java code
Run the following at the project root directory to build the maven project.
mvn compile
This command makes Maven execute the compile goal.
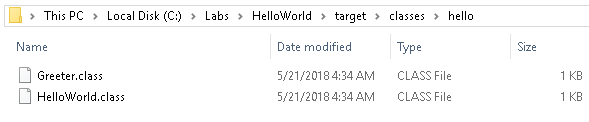
You can find the compiled class files in the target/classes directory.
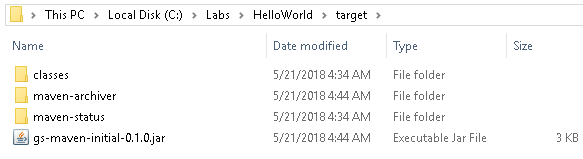
The package goal will compile your Java code, test it, bundle it in a package (jar or war), and save itin the target directory.
mvn package
This command makes Maven creates a file named gs-maven-inital-0.1.0.jar based on the artifactId and version values of the project.
To execute the JAR file, run:
java -jar target/gs-maven-initial-0.1.0.jar
Maven also maintains a repository of dependencies on your local machine (usually in a .m2/repository directory in your home directory) for quick access to project dependencies. If you’d like to install your project’s JAR file to that local repository, then you have to invoke the install goal:
mvn install
The install goal will compile, test, and package your project's code and then copy it into the local dependency repository, ready for another project to reference it as a dependency.

The following goal will delete all artifacts generated by the build.
mvn clean

You can invoke multiple goals as follows:
mvn clean compile
To execute HelloWorld with Maven, run:
mvn exec:java -Dexec.mainClass=hello.HelloWorld
Declare Dependencies
Most applications depend on external libraries.
Modify HelloWorld.java as follows.
HelloWorld.java
package hello;

import org.joda.time.LocalTime;

public class HelloWorld {
  public static void main(String[] args) {
    LocalTime currentTime = new LocalTime();
    System.out.println("The current local time is: " + currentTime);

    Greeter greeter = new Greeter();
    System.out.println(greeter.sayHello());
  }
}
Here, HelloWorld uses Joda Time’s LocalTime class to get and print the current time. If you were to run mvn compile to build the project now, the build would fail because you’ve not declared Joda Time as a compile dependency in the build. You can fix that like below.
pom.xml
<?xml version="1.0" encoding="UTF-8"?>
<project xmlns="http://maven.apache.org/POM/4.0.0"
         xmlns:xsi="http://www.w3.org/2001/XMLSchema-instance"
         xsi:schemaLocation="http://maven.apache.org/POM/4.0.0
                             http://maven.apache.org/maven-v4_0_0.xsd">

  <modelVersion>4.0.0</modelVersion>
  <groupId>org.springframework.gs</groupId>
  <artifactId>gs-maven-initial</artifactId>
  <version>0.1.0</version>
  <packaging>jar</packaging>

  <dependencies>
  <!-- https://mvnrepository.com/artifact/joda-time/joda-time -->
    <dependency>
      <groupId>joda-time</groupId>
      <artifactId>joda-time</artifactId>
      <version>2.14.0</version>
    </dependency>
  </dependencies>

</project>
Run mvn compile again, the build should succeed.
The scope is also a child of dependency.
This element has a default value so that you can omit it.
The value of scope is either compile, provided, or test.
Among of them, the default is the compile.
For the rest of the values, see below.
- provided: Required at compile time but provided by the container at runtime (e.g., Servlet API)
- test: Required for compilation and testing, but not needed for build or run.
mvn archetype:generate
The mvn archetype:generate allows you to create a maven project interactively. (Archetype has a lexical meaning of prototype, which in Java stands for project prototype) This command creates the maven directory structure and pom.xml file. You can build prototypes of various Java projects with it.
In the directory of your choice, run:
mvn archetype:generate
In the screen below, Enter to select maven-archetype-quickstart.
Choose a number or apply filter (format: [groupId:]artifactId, case sensitive contains): 2004:
In the screen below, Enter to select the latest version.
Choose org.apache.maven.archetypes:maven-archetype-quickstart version:
1: 1.0-alpha-1
2: 1.0-alpha-2
3: 1.0-alpha-3
4: 1.0-alpha-4
5: 1.0
6: 1.1
7: 1.3
8: 1.4
Choose a number: 8:
Type groupId and artifactId values like below. (for version and package, Enter to accept the default)
Define value for property 'groupId': : org.springframework.gs
Define value for property 'artifactId': : quick-start
Define value for property 'version':  1.0-SNAPSHOT: :
Define value for property 'package':  org.springframework.gs: :
On the screen below, press the Enter key.
Confirm properties configuration:
groupId: org.springframework.gs
artifactId: quick-start
version: 1.0-SNAPSHOT
package: org.springframework.gs
 Y: :
Maven creates a quick-start directory whose name is the same as the artifactId value. And Maven also builds a maven directory structure and pom.xml file in the root directory. (Here, the root directory is C:\foo\quick-start)
pom.xml
<?xml version="1.0" encoding="UTF-8"?>

<project xmlns="http://maven.apache.org/POM/4.0.0" xmlns:xsi="http://www.w3.org/2001/XMLSchema-instance"
	xsi:schemaLocation="http://maven.apache.org/POM/4.0.0 http://maven.apache.org/xsd/maven-4.0.0.xsd">
  <modelVersion>4.0.0</modelVersion>
  <groupId>org.springframework.gs</groupId>
  <artifactId>quick-start</artifactId>
  <version>1.0-SNAPSHOT</version>
  <name>quick-start</name>
  <url>http://www.example.com</url>

  <properties>
    <project.build.sourceEncoding>UTF-8</project.build.sourceEncoding>
    <maven.compiler.source>25</maven.compiler.source>
    <maven.compiler.target>25</maven.compiler.target>
    <spring.version>7.0.5</spring.version>
  </properties>

  <dependencies>
    <dependency>
      <groupId>junit</groupId>
      <artifactId>junit</artifactId>
      <version>4.11</version>
      <scope>test</scope>
    </dependency>
    <dependency>
      <groupId>org.springframework</groupId>
      <artifactId>spring-context</artifactId>
      <version>${spring.version}</version>
    </dependency>
  </dependencies>
  <!-- omit -- >
To check the latest spring framework release, See http://projects.spring.io/spring-framework/.
Spring means various frameworks based on the bean container that contains and manages Java classes.
We've added Spring-context dependencies to pom.xml. Here is a brief description of Maven's dependency management features: Suppose the project relies on the A library and A depends on B. Maven will store both A and B in the repository with only the A dependency configuration. Thus, even if you add only the spring-context, Maven would save other libraries dependent on spring-context in the repository.
Run Notepad to create the MessageService.java, MessagePrinter.java, and Application.java files in the hello folder at the command prompt, as shown below.
C:\..quick-start\src\main\java\hello> notepad MessageService.java
MessageService.java
package hello;

public interface MessageService {
  String getMessage();
}
C:\..quick-start\src\main\java\hello> notepad MessagePrinter.java
MessagePrinter.java
package hello;

import org.springframework.beans.factory.annotation.Autowired;
import org.springframework.stereotype.Component;

@Component
public class MessagePrinter {

  @Autowired
  private MessageService service;

  public void printMessage() {
    System.out.println(this.service.getMessage());
  }
}
C:\..quick-start\src\main\java\hello>notepad Application.java
Application.java
package hello;

import org.springframework.context.ApplicationContext;
import org.springframework.context.annotation.*;

@Configuration
@ComponentScan
public class Application {

  @Bean
  MessageService mockMessageService() {
    return new MessageService() {
      public String getMessage() {
        return "Hello World!";
      }
    };
  }

  public static void main(String[] args) {
    ApplicationContext context =
        new AnnotationConfigApplicationContext(Application.class);
    MessagePrinter printer = context.getBean(MessagePrinter.class);
    printer.printMessage();
  }
}
compile
mvn compile
run
mvn exec:java -Dexec.mainClass=hello.Application
We didn't combine MessagePrinter and MessageService in the code. But Spring Framework combines them.
Check stored libraries in Maven's local repository.
C:\Users\kim\.m2\repository\org\springframework>dir /w

[spring-aop]  [spring-beans]  [spring-context]  [spring-core]

[spring-expression]
You can confirm that Maven also installed the spring-aop, spring-beans, spring-core, and spring-expression dependent on spring-context.
References